
Do you know what today is?

That’s right! It’s time to spice up Elsa’s apartment with bedding, wall art, accent pieces, and anything else we can think of! And, even though Thanksgiving has already come and gone, I’m going to take this opportunity to use some of my favorite harvest-themed crafts and trinkets.

It’s not my fault they’ve sat in storage for so long. The holidays pass by too quickly! Besides, we both know it takes time to create a beautiful space. The prettification process cannot be rushed.
Now, stop critiquing my design tactics, and help me carry this pile of knickknacks. We’ve got a doll room to decorate!

The Bedding:

Forget the icicles! My Elsa prefers a comfy hygge vibe over spired snow castles, so we’re filling her home with lots of warm, cozy elements. And since nothing says “warm and cozy” like a heap of blankets and plush pillows, let’s start by fixing up that empty bed!
If you recall, Elsa has a murphy bed that doubles as a bookcase. All you have to do is lower the inner frame to reveal the mattress.

Check out our Farmhouse Apartment tour for a closer look at this bed and how it works.
I want the bed to have layers (because layers equal warmth), but I also want to keep things simple. That means no sheets, duvets, or bed skirts.
Instead, I’m focusing on just three pieces: a comforter, a blanket, and pillows.

I made the bedding following the same technique shown in our tutorial, How To Sew Blankets And Pillows For Your Dolls. The only differences are the measurements and that the comforter has a layer of quilt batting to make it fluffy.
And I know I said we were decorating this room for fall yet made a Christmas-patterned blanket. You see, other than navy, this is the only fabric in my stash that matches Elsa’s wallpaper. Since I’d already used navy for the comforter, my only other options were white, dark green, or this pretty winter forest print. I chose the forest fabric because I wanted something more exciting than a solid color. Besides, those Scandi-style trees totally fit our hygge ambiance, so we’re going with it.


Poor Elsa! I know how she feels. It’s not easy to make a bed when you’ve got a sleepy cat stalking you😂.
I also made throw pillows, using a Post-It note as a pattern. Two are navy like the comforter, and the other two are hunter-green.


The green pillows look fabulous, but the navy ones disappear in the sea of blue, so I’m going to move them to the couch.

That looks pretty good—except now I’m wondering if I should’ve quilted the comforter? Maybe stitched a grid pattern across it? Hmmm…I’m going to try it. Be right back!


Elsa’s bed is officially done and is a thousand times snugglier—cat hair and all!
Now, let’s deck the walls and accessorize the shelves with some miniature miscellany!
Rugs, Signs, Flowers, and More!

Alright, girls, what should we work on first?

Ooo, I’m so ready to decorate those shelves. But Elsa is right. We ought to get that rug out of the way first.
Sheets of felt make excellent dollhouse rugs. They are inexpensive and come in a variety of patterns and textures (like faux leather). I bought this felt sheet at Hobby Lobby for about 0.99 cents.

It’s a black and white buffalo print, which is perfect for Elsa’s apartment. The monochromatic palette adds contrast without being overly bold.

Hold on a second, Tink. There’s one more thing I’d like to do before bringing anything else out.

I need to hang a hook by the door for Elsa’s handbag because, right now, it just floats around the room.
I’m using a brass picture hanger as they seem to work well for doll-sized hooks.


It’s not the prettiest hook in the world, but it does the trick.
Now that that’s done, we can move on to more exciting activities, like a few autumn DIYs.
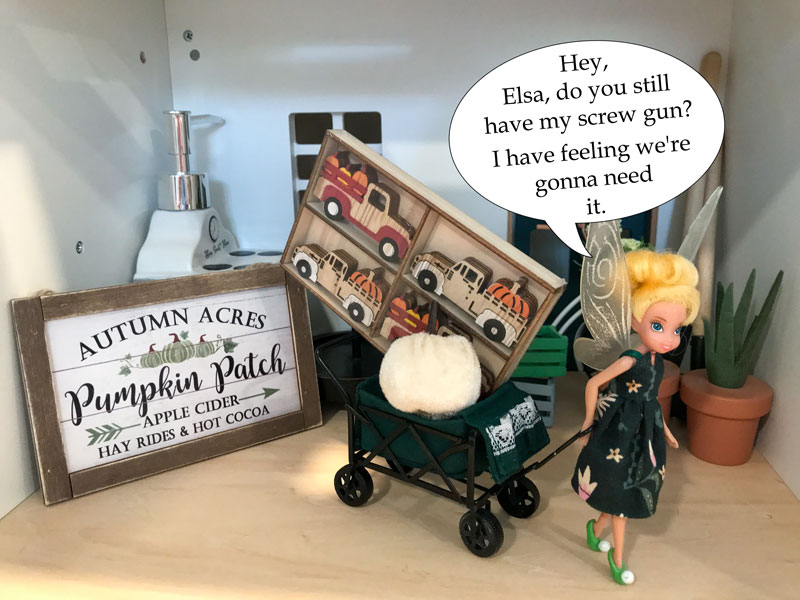
I found these miniature plywood trucks at Hobby Lobby. They were in the fall crafts section with a sticker price of $3.99; however, I got them on sale for about $2.00.

There are a total of twelve pumpkin-laden trucks. They are mostly unfinished. Only the pumpkins and the area around the wheels are colored.
The raw wood is a bit rustic for my taste, so the dolls and I repainted the trucks to give them a whimsier look.

Elsa chose blue hues, Tink went with earthy tones, and mine are—you guessed it—pink!

These mini trucks are quite thin (a mere 1/8″ thick) and can’t stand without support. But that’s not a problem for crafty people like us😉. Here are two easy ways for turning these wood wafers into freestanding ornaments.
Since there are so many trucks in this set, we can glue three together, creating a single thick truck that has no problem staying upright.

Or we can cut a popsicle stick into short pieces then glue the pieces behind the trucks to prop them up.


Either way gives you a super cute truck that stands on its own. Elsa is keeping the dark green one, and the rest we’ll save for future doll rooms.
Sister gave me these tiny cotton stems a few months ago, along with several other dollhouse goodies (they were a birthday present😊).
I’m obsessed with full-scale cotton stems so, of course, I had to have some in my miniverse.

We can put the branches in a mini mason jar and set them on a shelf for a touch of southern charm.

Next, I made a small flower pot using scrapbook paper and filled it with a paper succulent.

I like how the pot adds a nice pop of brightness without looking garish. Still, I bet we can make something even more autumn-y.
Since mums are a classic fall floral, let’s make a quick mum arrangement using stickers.

Here we have a package of 3D mini mum stickers. There are three maroon mums, three yellow ones, and three red ones. I think they will look cute in the little milk can Tink is holding.
A single mum completely covered the can’s mouth, so I picked out a maroon one and glued it to the rim.

Now, Elsa has a container of vibrant fall foliage!

When it comes to autumnal decorations, pumpkins reign supreme, so let’s set a couple of our DIY fabric pumpkins by the door.

These pumpkins are one of my favorite crafts because you can customize them to fit your doll’s style.
Want to make fabric pumpkins for your dolls? Check out our tutorial here: DIY Fabric Pumpkins For The Dollhouse.
Okay, who’s ready to talk wall decor!

I was planning on displaying Elsa’s ceramic plates on the bookcase shelves. After thinking it over, though, I decided they’d be safer glued to the wall.
I shaped a wall-hanging plate hanger out of gold wire.

This was definitely an intricate project. Getting the racks even and curved just right for the plates was tricky (plus the glue took forever to dry). Nevertheless, I triumphed😁!

The plates are secure in the holder, and the holder hangs flat against the wall.
We’re down to our very last task–hanging the Pumpkin Patch sign.

I used removable glue dots to attach the sign to the wall.

And there you have it—an adorable piece of country-chic artwork for our farmhouse apartment!
Since the glue dots aren’t permanent, I should be able to move or reposition the sign without damaging the wallpaper. At least, that’s what the box says.
All in all, I think we did pretty good turning this empty room into a comfortable home for Elsa. We sewed bedding, added some necessary hardware, crafted fall-inspired decorations, and made plants.

I still need to finish out the bookshelf with books, but we’ll save that for another day (making printables takes time, you know😉).

Now it’s your turn!
Tell me, is Elsa’s farmhouse hygge enough? What else would you add to cozy up this space? Feel free to leave your ideas in the comment section, and I hope you all have a wonderful, happy Thanksgiving weekend!

Elsa’s apartment looks amazing! I really love the plates and their rack. Gabby also made me giggle 🙂
Thank you! There are a few more things I need to add, but overall I love how the room turned out.
Yes, mini Gabby is full of antics (just like her real-life counterpart😄).