
I don’t know about you, but keeping sewing patterns intact and able to be used over and over is important to me. I mean, if I’m going to spend my hard-earned cash, I want whatever I buy to be around for a while (unless it’s a chocolate chip cookie. Then I’ll make an exception?).
But most sewing patterns (particularly those bought in stores) come printed on thin tissue paper and are easily torn. Also, once opened, it’s almost impossible to fit the pattern back inside the envelope unless you cut out the individual pieces which means you now have fragments of tissue floating around just waiting to get lost!
So, how do you keep these fragile bits of paper safe for long-term use? Well, there are several ways, and I thought it would be fun to go behind the scenes and show you how I store my patterns.

Let’s start with organizing. I keep all of my patterns in three-ring binders. There are binders for plastic canvas patterns, cross-stitch patterns, and, of course, sewing patterns.

I further categorize them by dedicating a binder to a specific doll size; i.e. one for Barbie dolls, one for Disney Animator dolls, and one for 18-inch dolls.
After opening a pattern, instead of trying to stuff it back inside the envelope, I go ahead and cut out all the pieces.


To keep them from tearing or getting wrinkled, I glue sections smaller than a sheet of paper (like doll bodices and sleeves) to cardstock.
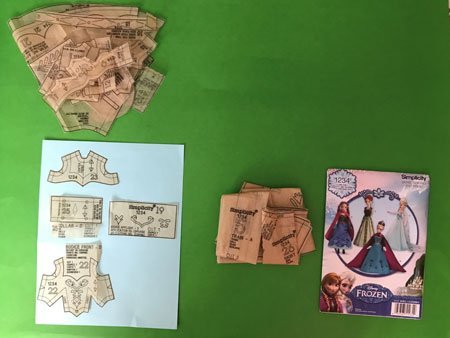


This is an excellent way to keep from losing small elements.
Pieces that are too big to fit on a sheet of paper (doll skirts, trains…even patterns designed for people), can be strengthened using fusible interfacing.

Interfacing (such as Pellon) comes in two forms: sew-in and press-on. It is used to stiffen fabric and make it hold its shape (think about the collar on a jacket) and to reinforce waistbands and buttonholes on clothing. However, it also happens to be a superb pattern protector!
To apply the interfacing, lay the adhesive side (bumpy side) against the wrong side of your fabric (or sewing pattern), then use an iron to press your pattern to the interfacing.

Be sure to use a dry iron set on low otherwise the tissue paper might wrinkle and distort your pattern
Since the interfacing strengthens the paper without making it bulky, the pattern can be re-folded and placed back inside the envelope.


Before adding the pattern to the binder, I like to go back and write any pertinent information (like how many pieces to cut out and what type of fabric to use) next to the pieces glued to cardstock.

Afterwards, everything is slipped into protective sleeves and snapped into the binder.

I place the envelope (containing the instructions and large folded sections) in front to help me remember which pattern these pieces belong to.

I know what you’re thinking, though: how am I supposed to use a pattern that’s been glued down? Easy-peasy, my friend!
When you’re ready to sew, grab some tracing or computer paper and trace around the pieces glued to cardstock. Use the pieces you traced as your pattern. Do the same thing for the pieces backed with interfacing–just unfold them and trace the pattern onto another sheet of paper.

This technique allows you to use the same pattern over and over again and gives you the freedom to “customize” it without damaging your original. Like, if you need to make the outfit smaller, just trace the stitching lines instead of the cutting lines.

Patterns that come in PDF format are even easier to keep in top-notch condition. Simply print the pages out, slip them into a protective sleeve, and clip them into a binder. No glue or interfacing required!

And now, dear readers, you know my secrets to pattern organizing and preserving! Happy sewing!
